
Embroidery on shirts is the best way to customize your apparel, bringing creative flair to something as simple as a shirt. Whether you're a newbie wishing to try hand embroidery or an expert who wants to use a machine for more elaborate patterns, this guide will help you get started.
True Digitizing has expertise in converting your ideas into high-quality embroidered designs. Whether you want embroidery designs for shirts, caps, or accessories, we cover everything you need.
At first, embroidery looks difficult, but it's easier than you think. The key is to use the right resources and follow a structured procedure. Here's a brief overview of how to get started:
Choose a shirt with a fabric that is just a little thick or stretchy. Cotton or cotton blends perform best because they give a firm surface for embroidery.
Select either to embroider with a machine or by hand. Machine embroideryis quicker and more suited for precise designs.
You can either use previously embroidered patterns or create your own. For newcomers, basic designs are easier to manage. True Digitizing assists people with customized, unique logos or designs by converting their digital artwork into embroidery-friendly designs.
Use water-soluble markers, transfer paper, or an embroidery transfer pen to transfer the design to the shirt.
Use a stabilizer behind the material to keep puckering. This procedure is especially important when working with stretchy fabric, such as t-shirts.
Once your design is in the right place and stabilized, it is time to start stitching.
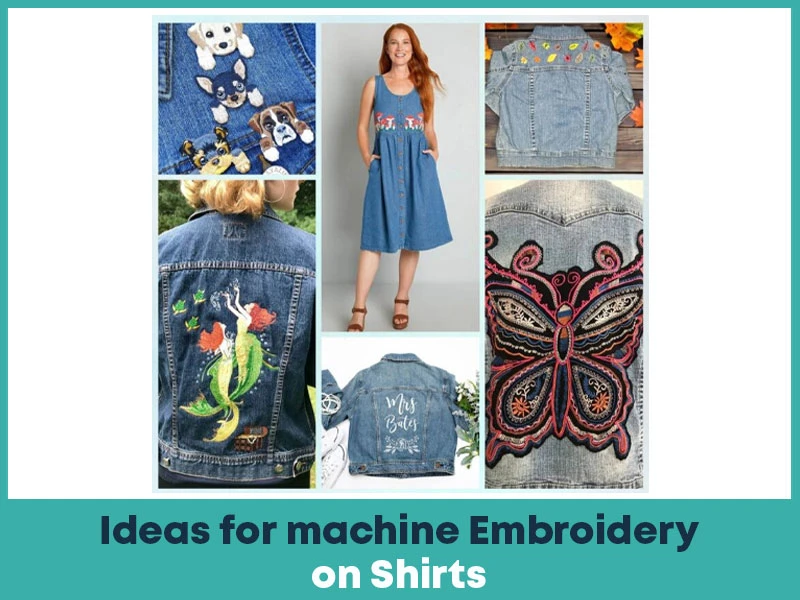
If you want to get creative with embroidery on shirts, here are some ideas to get you started:
Customize your shirt with initials or a monogram. This simple idea looks great and is good for beginners.
Floral designs are classic embroidery designs that can be as simple or complex as you choose. A small floral design on the chest or sleeves gives a distinctive touch to your shirt.
Do you want to promote a business logo or a personal symbol? Machine embroidery is perfect for designing neat, professional-looking logos for apparel. True Digitizing helps you create a digitized version of your logo suitable for machine embroidery.
Embroidering short quotations or words of encouragement is a popular trend to convey your message. These designs are often minimal, making them perfect for freshers.
Embroidering a seasonal design, like as pumpkins for autumn or snowflakes for winter, can add fun and variety to your wardrobe.
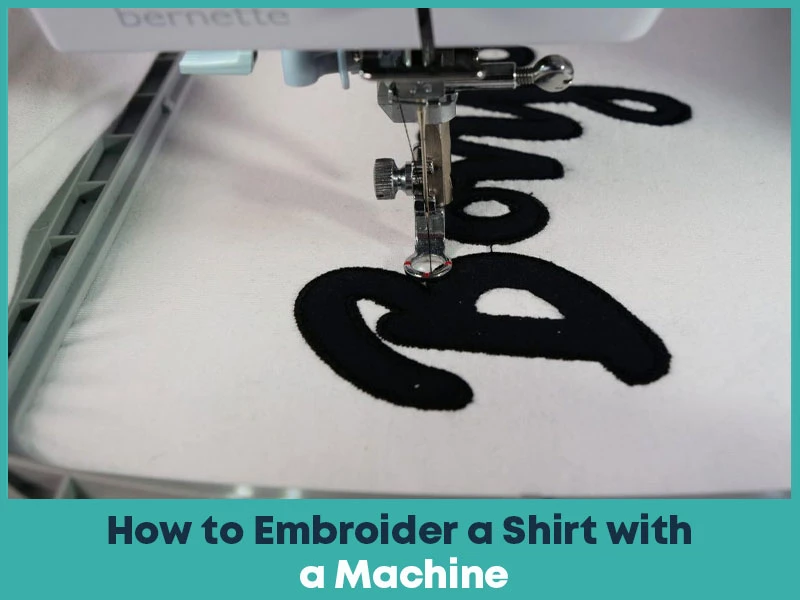
Machine embroidery on shirts appears to be a professional-level craft, but with the right tools and proper guidance, anyone can do it. Here is a step-by-step guide:
First, stabilize the shirt with a fabric-specific backing (tear-away or cut-away stabilizers work well). Then choose your machine embroidery design. If you do not have one, True Digitizing transforms your design into a digitized file that can be used with embroidery machines.
Set the digitized design into your embroidery machine. Align the shirt appropriately on the machine's hoop, ensuring that your design is centered and properly placed.
First, test your design on a scrap piece of fabric before stitching it directly to your shirt. This step ensures that the design's size, colors, and stitch quality are as expected.
Once everything is in the right place, let the machine work its magic! Monitor the process to avoid thread breakage and other common issues.
Once your design is complete, remove the stabilizer and iron the embroidered area to get a smooth finish.
Machine embroidery is a time saver on larger or more elaborate designs, especially if you're making a lot of customized shirts.
If you're new to embroidery, starting with shirts might feel like a big task, but breaking it down into small steps can make the process manageable. Here's how beginners can get started:
Start Small: Choose simple designs like hearts, stars, or your initials. These are easier to manage and help you practice basic stitches.
Use the Right Tools: Invest in a beginner-friendly embroidery kit that includes an embroidery hoop, embroidery machine, thread, and fabric. Having the right tools can make the learning process much smoother.
Practice on Scraps: Before working on your shirt, practice on scrap fabric. This helps build confidence and reduces mistakes when you move to your final piece.
Embroidery on shirts is a fun and creative way to customize your apparel, whether done by hand or with a machine. Following these steps helps you to easily create stunning, unique designs. And if you're looking for high-quality digitized designs,True Digitizing helps you convert your ideas into perfect embroidery designs. With our experienced digitizing services, you will get the perfect embroidered look every time.
Nick William has been immersed in the world of embroidery digitizing for over 20 years, earning 25 industry awards throughout his career. As a 3rd generation embroidery expert, Nick’s journey started in his family’s workshop, where he learned the art of digitizing before the rise of modern software. He has worked with leading commercial embroidery businesses and has shared his expertise with over 75,000 home and professional embroiderers. As an author at True Digitizing, Nick is passionate about teaching others how to create beautiful, precise designs through easy-to-follow tutorials and expert advice.
Categories

3D Puff on Hats: How to Achieve the Perfect Raised Look
02-12-2025
Choosing the Right Stabilizer for Every Fabric Type: Complete Guide
01-12-2025
Embroidery Thread Weight Explained: 30wt vs 40wt vs 60wt
01-12-2025

Holiday Embroidery Trends | Top Designs for Thanksgiving through Christmas
27-11-2025

Thread Nesting Under Fabric? Here’s What it Means and How to Fix it
25-11-2025
Understanding DST, PES, and Other Embroidery File Formats | A Complete Guide
20-11-2025

Top 10 Vector File Formats Every Designer Should Know in 2026
14-11-2025
Polyester vs Rayon Embroidery Threads | Which One Should You Choose?
14-11-2025
AI vs Manual Vector Tracing: Which One Gives Better Results?
06-11-2025
Metallic Embroidery Thread | Tips, Tricks and Common Mistakes to Avoid
04-11-2025