At True Digitizing, we transform your creative spark into flawless, high-quality embroidery digitized designs that bring your vision to life.
We Accept
Copyright 2025 Truedigitizing
At True Digitizing, we transform your creative spark into flawless, high-quality embroidery digitized designs that bring your vision to life.
We Accept
Copyright 2025 Truedigitizing

Printing embroidery designs onto fabric involves a multi-step process. Firstly, the fabric needs to be prepared by washing and drying to remove any dirt and chemicals. Then, the design is printed onto the fabric using various methods such as screen printing, digital printing, or heat transfer. Factors to consider when choosing a method include the complexity of the design, the type of fabric, the color fastness of the ink, and the desired level of detail. Challenges in the process include ensuring precise alignment of the design, maintaining the integrity of the fabric, and achieving vibrant and long-lasting colors. Overall, the method chosen for printing embroidery designs onto fabric should take into account the specific requirements of the design, fabric, and desired outcome.
Embroidery designs are a beautiful way to add complex and unique details to clothing, accessories, and home decor. When it comes to printing embroidery designs, there are a few key supplies that are essential for creating high-quality and professional results. From specialized paper and stabilizer to the right type of ink and a reliable printer. Having the right supplies on hand is crucial for ensuring that your embroidery designs look their best when printed onto fabric.
In this blog post, we will explore the necessary supplies needed for printing embroidery designs and discuss the important role that each one plays in the printing process.
To find and use a light source for tracing your embroidery template, you have few options. One popular choice is to use an electric light pad designed specifically for this purpose. Simply place your template on top of the light pad and your fabric on top of the template. Ensuring that the light shines through for easy tracing.
If you don't have an electric light pad, you can make your own light pad by using a plastic container and a piece of glass. Place a bright light source, such as a lamp or LED light, inside the plastic container and place the glass on top. Then, place your template on the glass and your fabric on top to trace.
Another simple option is to tape your template to a brightly lit window. Make sure the template is backlit for easy tracing, and secure the template and fabric in place using washi tape or low-tack adhesive sticky tape.
Whichever method you choose, make sure your template is backlit and your fabric is securely in place for accurate tracing. With these light sources and techniques, it would be easy to trace your embroidery template.
To properly use an embroidery hoop, start by placing the hooped dark fabric over the pattern or design. Hold the hoop down with one hand to keep the fabric tight. Use your other hand to trace the design onto your fabric with a water-soluble fabric marker or a pencil. As you trace, rotate the hoop as needed to reach different areas of the design.
It is important to consider the delicacy of the design and the tightness of the fabric for the best results. If the fabric is not tight enough, it may pucker or cause the stitches to be uneven. Additionally, delicate designs require careful tracing to ensure that every detail is captured accurately.
By following these steps and keeping the fabric tight and the design delicately traced. You can create beautiful embroidery pattern pieces using an embroidery hoop.
To transfer an embroidery design onto fabric using a piece of fabric, start by taping the pattern to a window or lightbox. Then, position the piece of fabric over the pattern and trace the design using a fine-tipped, washable fabric pencil. It is important to use a lightweight, light-colored fabric that is semi-transparent when held up to a light source for best results. This will make it easier to see the pattern and accurately trace the design.
Remember to tape the fabric in place while tracing to ensure it does not shift. This method allows for the complex details of the design to be accurately transferred onto the fabric. Once the design has been traced, the fabric can be removed from the pattern and the embroidery work can begin.
To transfer an embroidery design onto fabric using a ballpoint pen, start by placing the fabric on a hard, flat surface. Then, lay the embroidery design over the fabric and secure it in place with pins or tape. Next, use a ballpoint pen to carefully trace over the design, applying firm and even pressure to ensure the lines are clear and distinct.
Once the design has been traced onto the fabric, remove the paper pattern and place the fabric on a clean, heat-resistant surface. Set your iron to low to medium heat and gently press it over the traced design, applying even pressure for about 10-15 seconds. Be sure to move the iron around to cover the entire design.
Allow the fabric to cool, then carefully lift a corner to check if the design has transferred. If the lines appear faint, repeat the process with slightly more pressure and heat.
Tracing paper is a useful tool for transferring patterns onto fabric without having to soak the fabric. To use tracing paper for this purpose, begin by placing the lightweight tracing paper over the pattern you want to transfer directly onto the fabric. Using a pencil or fabric marking pen, carefully trace the pattern onto the tracing paper. Once the pattern is traced, baste the tracing paper onto the fabric, ensuring that it is secure and flat.
Next, stitch through both the tracing paper and fabric along the traced lines. Use a straight stitch or the appropriate stitch for the pattern. Once the stitching is completed, carefully tear away the tracing paper from the fabric. The stitching will help keep the fabric in place while you remove the paper. Be sure to tear the paper away gently to avoid damaging the stitched design.
Select the embroidery design you want to print and make any necessary adjustments in size, colors, or layout using graphic or embroidery software.
Decide whether you’ll use heat transfer paper, sublimation printing, screen printing, or inkjet printable fabric sheets based on your fabric type and project needs.
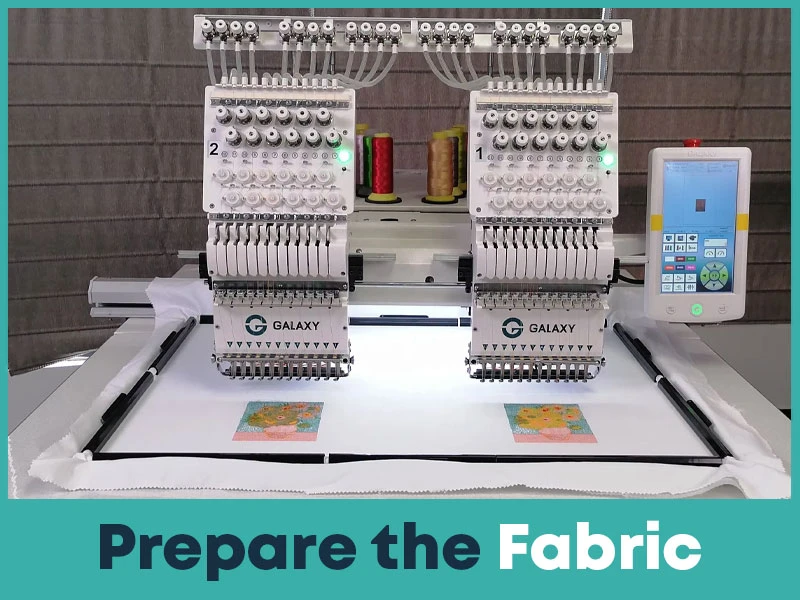
Wash, dry, and iron the fabric to remove dirt, chemicals, or wrinkles. This ensures better adhesion and a smooth surface for printing.
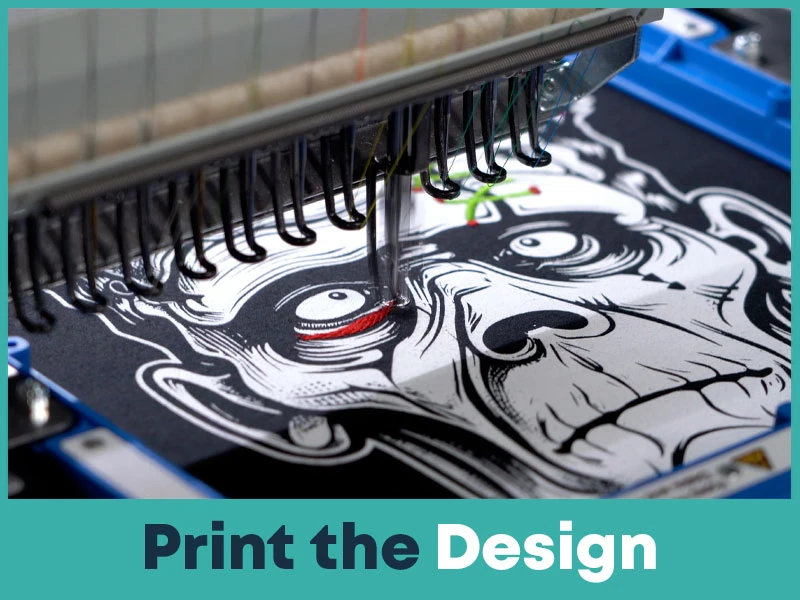
Using the chosen method, print your embroidery design onto transfer paper, sublimation paper, or directly onto fabric sheets with an inkjet printer.
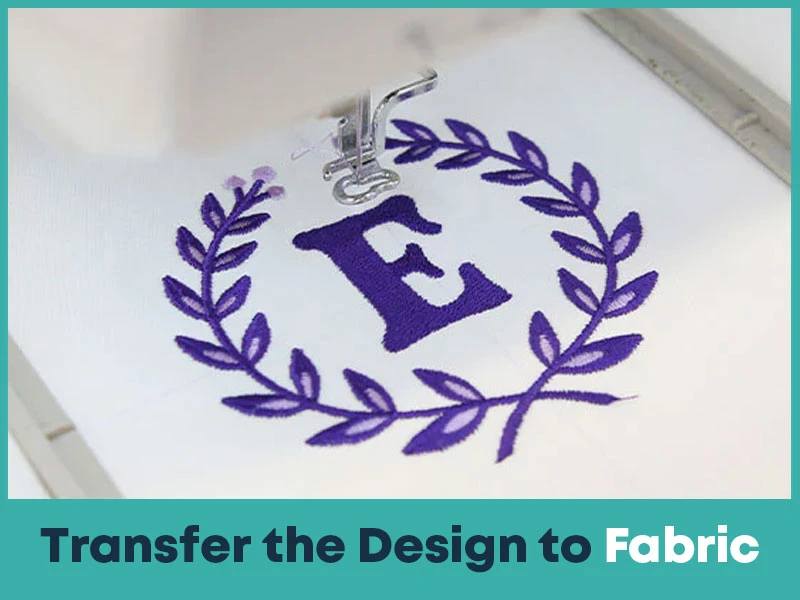
Apply the design to fabric using heat pressing (for sublimation or transfer paper), or by layering ink (for screen printing). Follow the recommended temperature and pressure settings.
Allow the ink to cure or heat set properly so the design becomes durable and long-lasting. This step helps prevent fading or peeling after washing.
Inspect the printed design for alignment and quality. Trim edges, press the fabric again if needed, and get it ready for embroidery stitching or final use.
Achieving stunning embroidered designs on fabric requires careful consideration of various factors, from design selection and digitizing to fabric preparation and hooping. The right supplies, such as a light source, an embroidery hoop, a piece of fabric, a ballpoint pen, tracing paper, and a flat working surface, are essential for precision. The process involves meticulous steps like fabric stabilization, thread selection, and a thorough pre-printing test.
To elevate your projects, explore our professional embroidery services, ensuring your creations receive the attention to detail you deserve. Embrace the artistry of printed embroidery designs with expert embroidery services today.
Nick William has been immersed in the world of embroidery digitizing for over 20 years, earning 25 industry awards throughout his career. As a 3rd generation embroidery expert, Nick’s journey started in his family’s workshop, where he learned the art of digitizing before the rise of modern software. He has worked with leading commercial embroidery businesses and has shared his expertise with over 75,000 home and professional embroiderers. As an author at True Digitizing, Nick is passionate about teaching others how to create beautiful, precise designs through easy-to-follow tutorials and expert advice.
Categories

Top Best Embroidery Digitizing Software in 2026
06-05-2026
")
Best Multi-Needle Embroidery Machines for Startups 2026
28-02-2026

DST File Format Explained: How to Create & Use for Embroidery
28-02-2026

Janome 550E vs Baby Lock Flare | Best Mid-Range Embroidery Machine?
26-02-2026

Choose the Right Fabric for Embroidery
20-02-2026

Advanced Techniques in Embroidery Digitizing
19-02-2026

Most Common Types of Threads to Use in Machine Embroidery
12-02-2026

AI in Embroidery | Revolutionizing Art and Efficiency
12-02-2026

Best Thread Tension 101 | A Guide for Embroidery Machines
09-02-2026

Mastering Small Lettering in Machine Embroidery
04-02-2026
Asked Questions