Another one would be batch master, Batch master looks and feels a little bit like a thin vinyl, it can be torn away from the outer edge. it does really well.
What do you also need? Of course, fabric, and the important part of the fabric is that you choose something that will hold up to the embroidery without puckering.
Another essential material is patch twill, patch twill has a shiny polyvinyl backing, and in the front, the fabric has a really beautiful sheen to it, it is very smooth when you stitch on it. It will hold up to the stitches just beautifully, also usable is regular twill as long as you reinforce it with, maybe woven fusible interfacing medium weight. You can also use quality cotton, but in all cases always be sure that it's something that won't pucker when you put the embroidery on top.
Lastly, you will need some kind of bonding agent so that you can place the finished embroidered patch onto the item that you want to have it on. Use Heat n Bond Ultrahold.
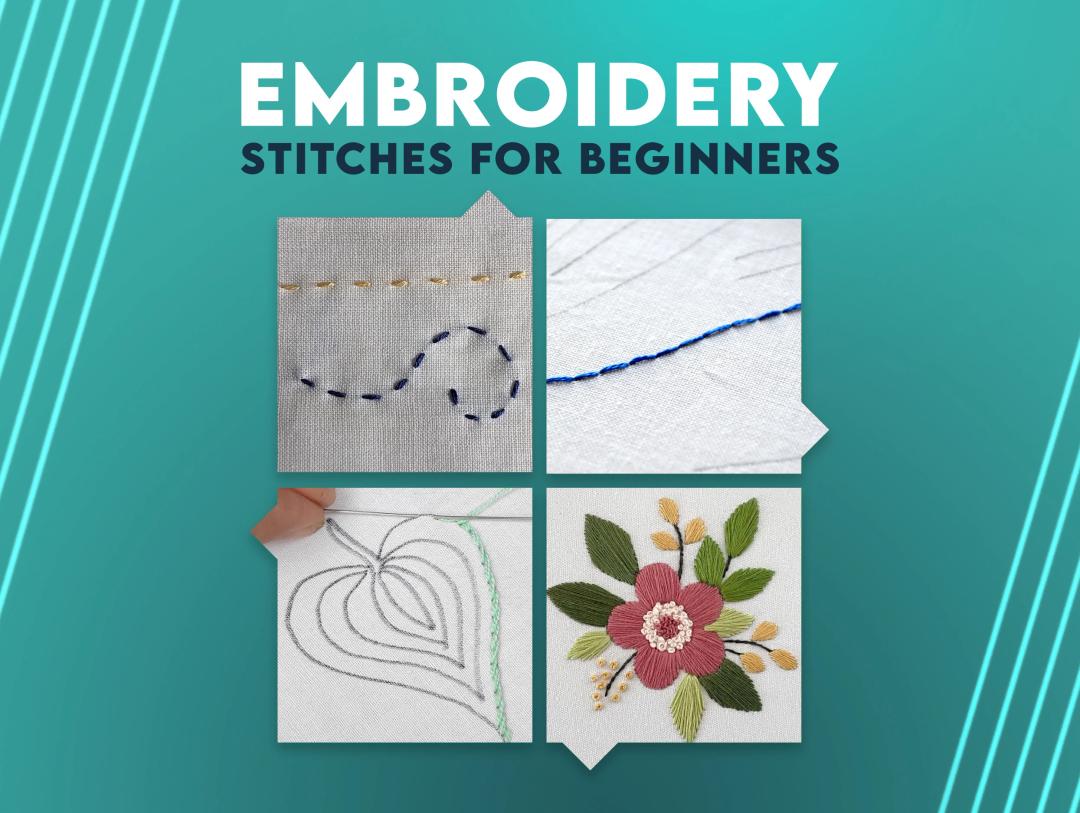
Embroidered Patch Making Process
Step 1: Hoop the Stabilizer and Stitch the Outline
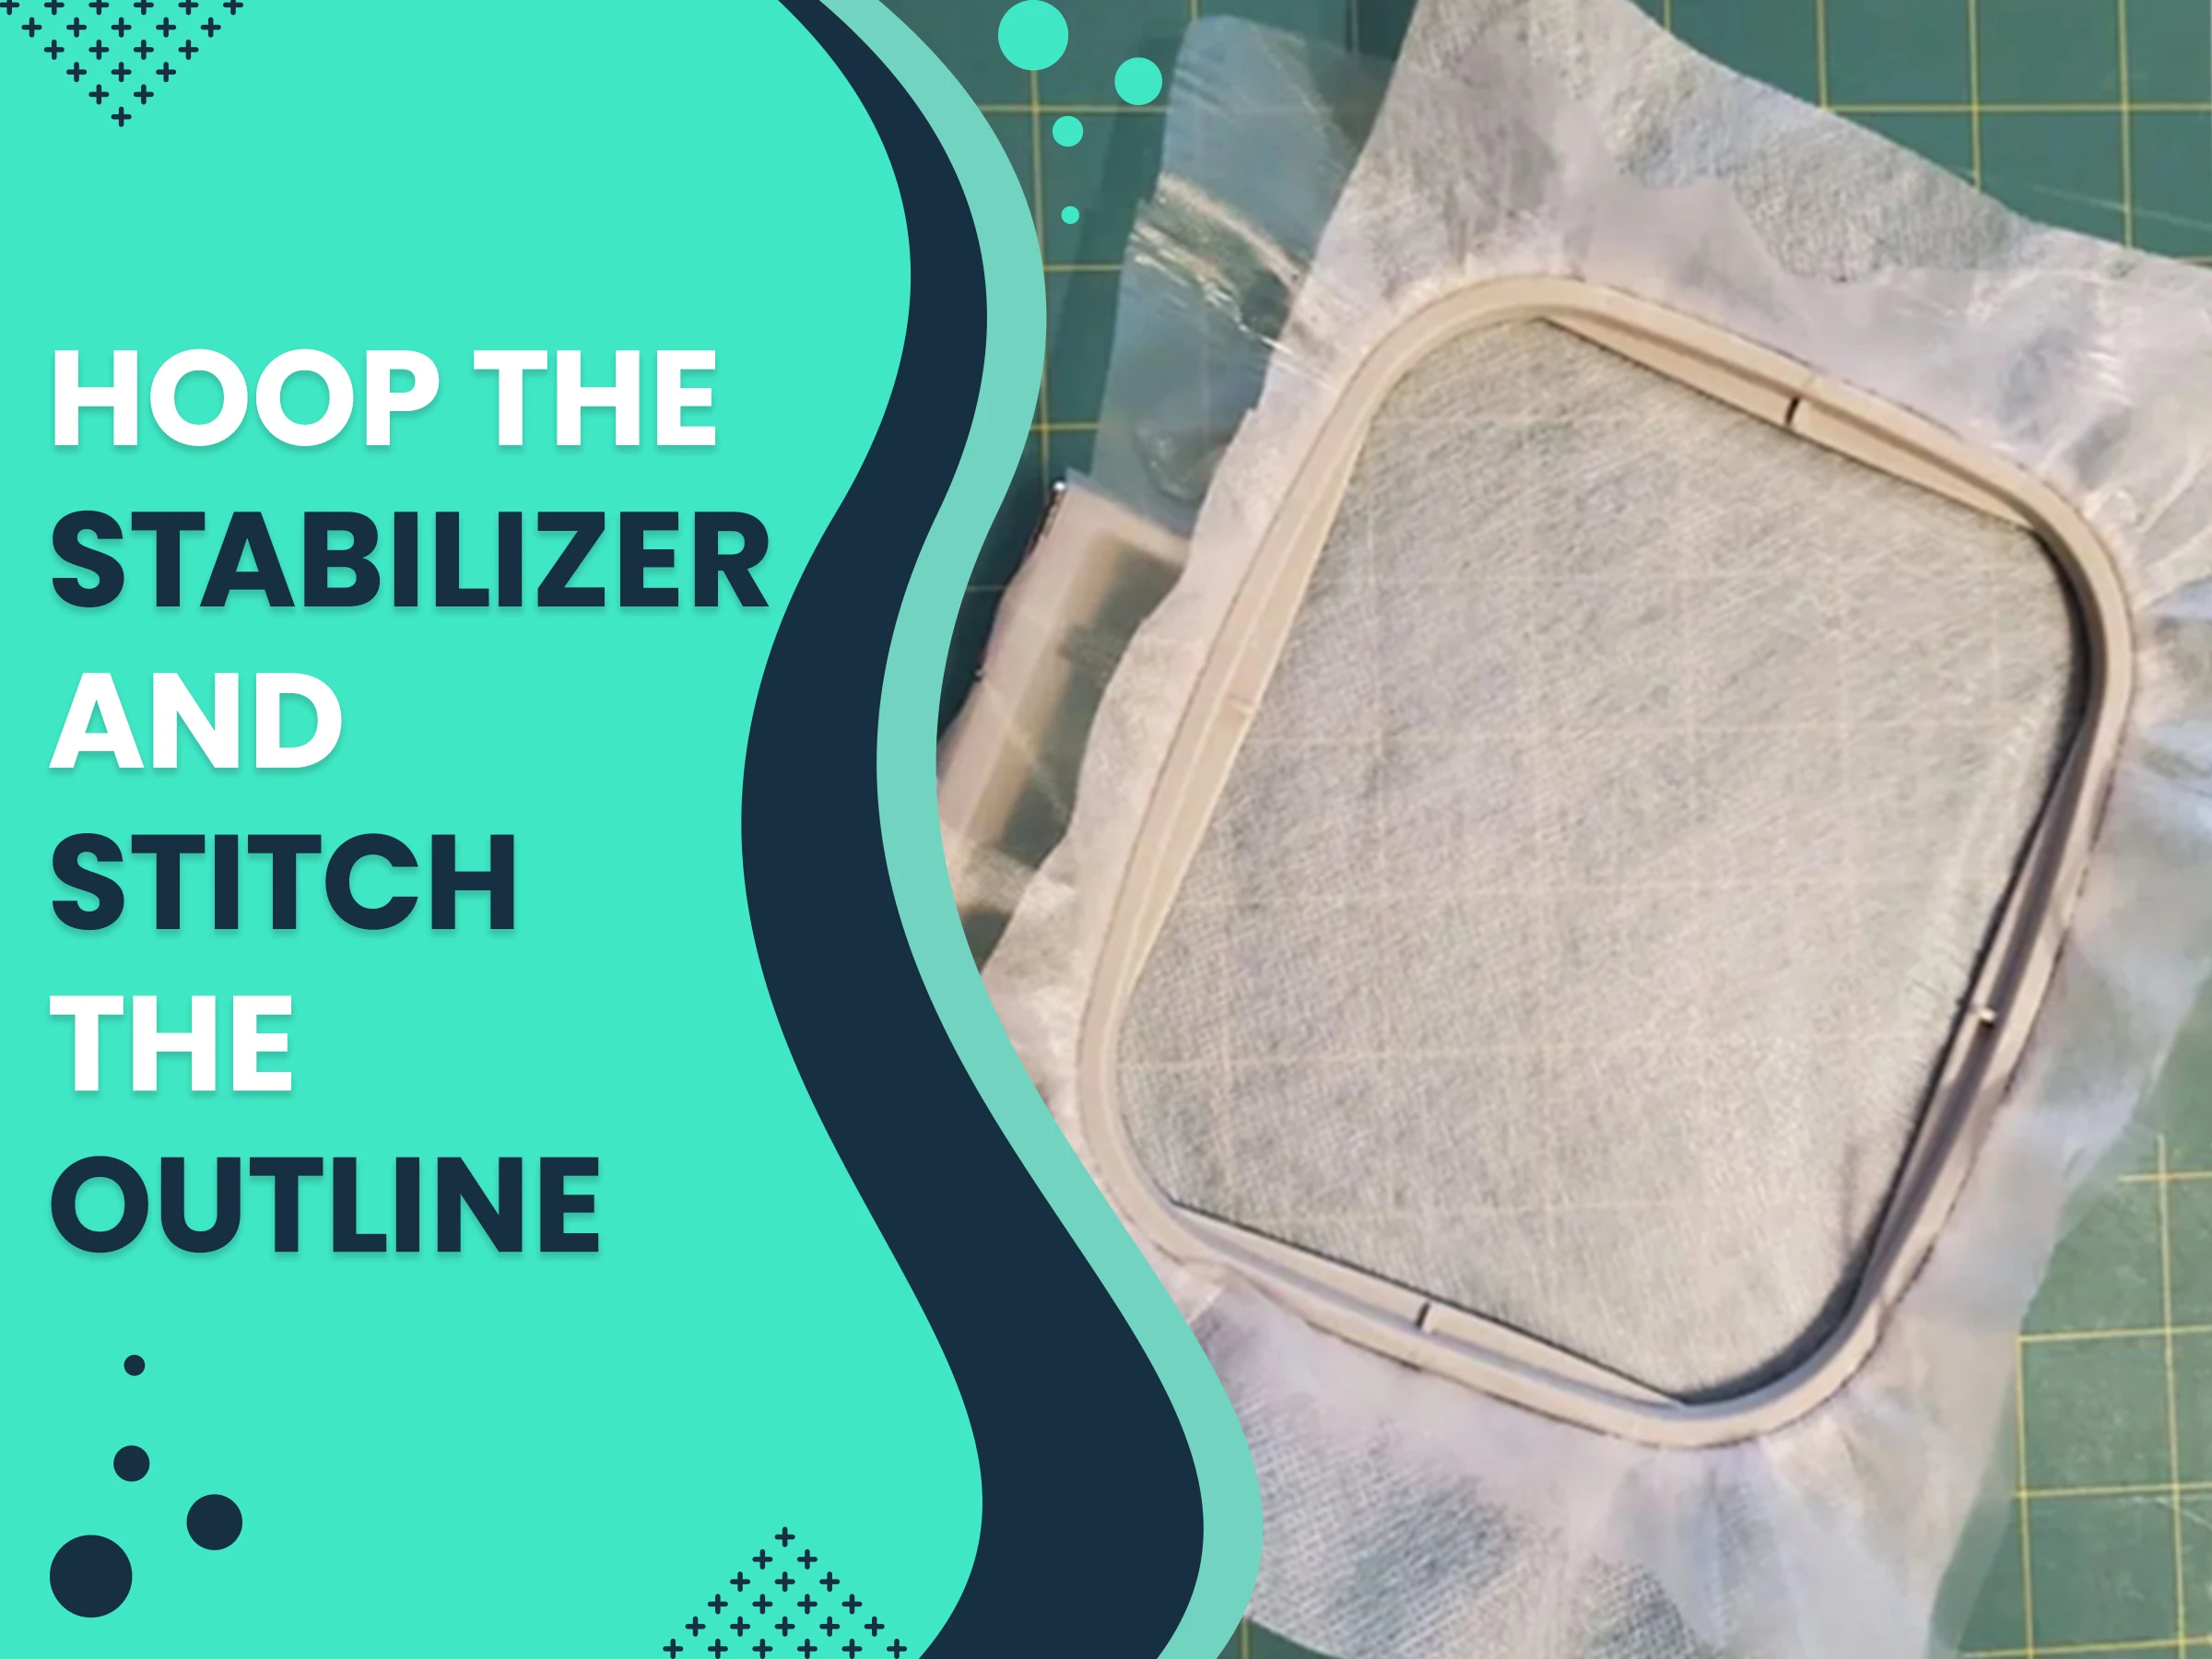 You are going to hoop your stabilizer, and the first color that you stitch will be stitched directly onto the stabilizer. A darker color is used so it is visible as the outline of the patch.
Step 2: Place and Secure the Fabric
Once the patch outline is stitched, take your pre-cut piece of fabric and place it over the outline please make sure all stitches are covered nicely. Secure it with a couple of pieces of tape before returning it to your machine.
Step 3: Tack Down the Fabric
Your machine will now tack down the piece of fabric, similar to how it would do with a design.
Step 4: Trim Excess Fabric
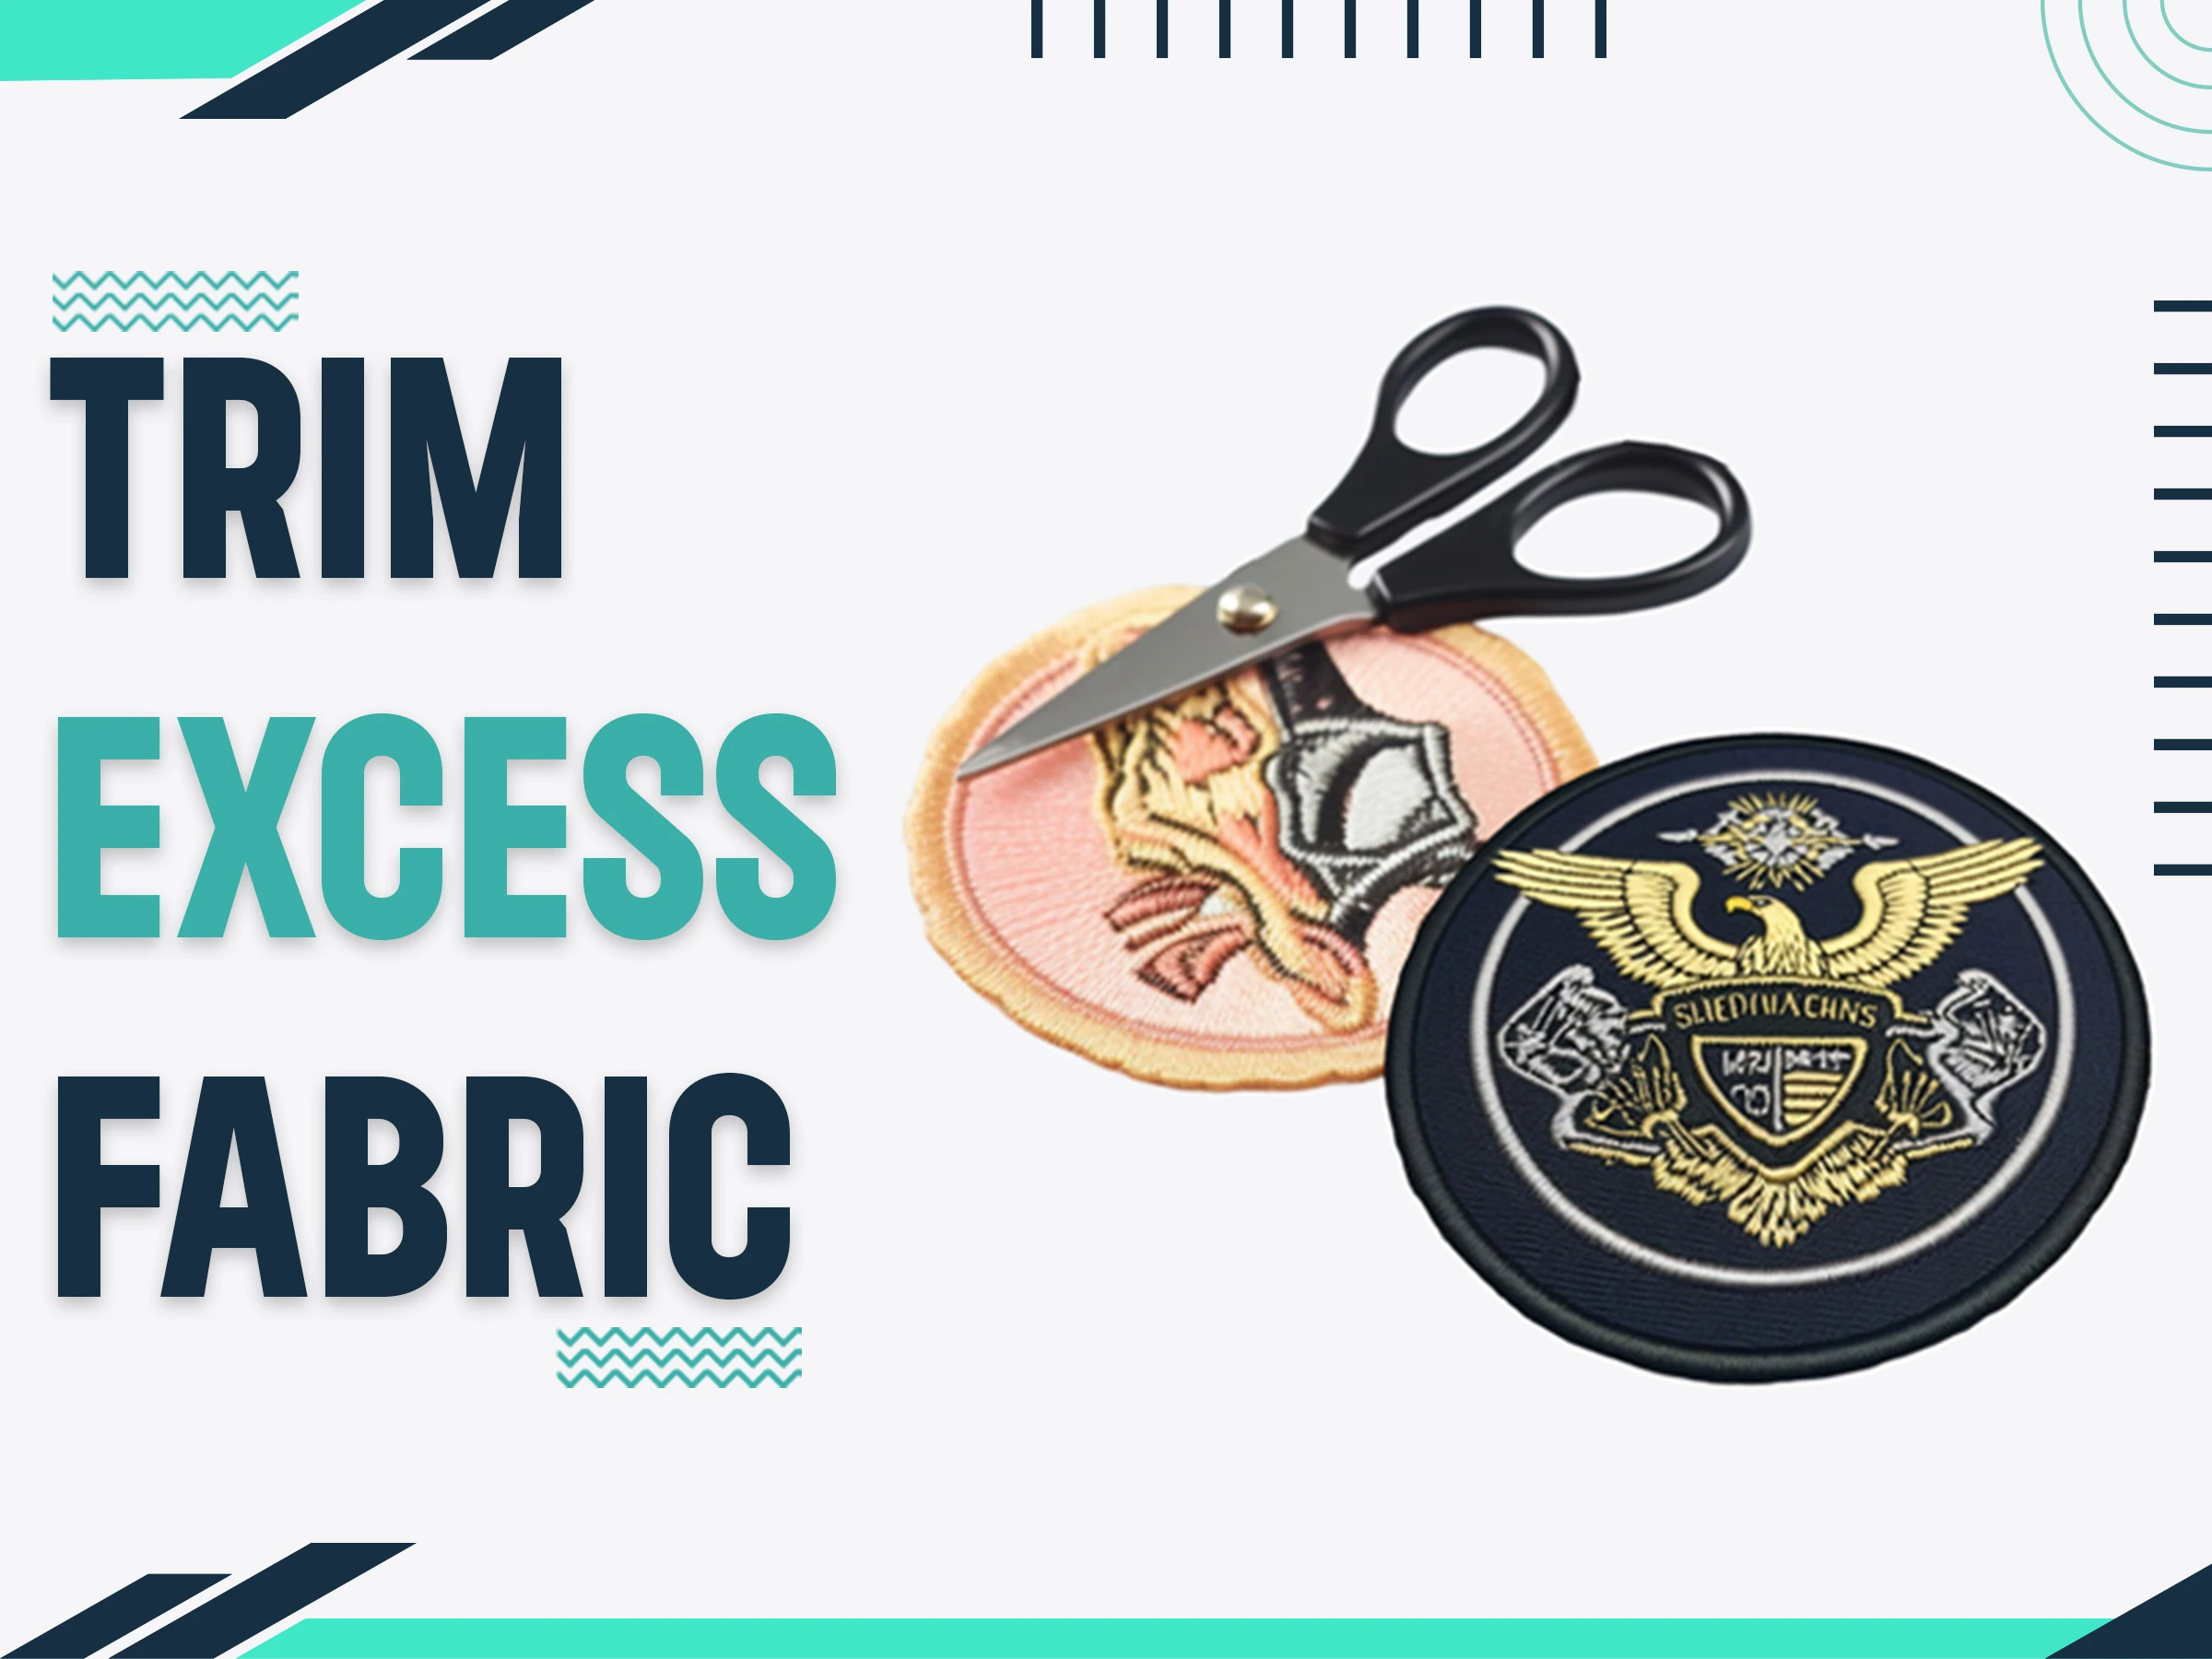 Take your curved tip scissors and cut off the excess fabric from the outside of the tack-down stitches. Try to get close, but don't worry if you cut into the thread, as it is a triple bean stitch.
Step 5: Use a Template for Pre-Cutting
Trimming while the fabric is in the hoop can be tedious. Also you can use a PDF template included with your download, cut it out, and use it as a guide to pre-cut your fabric.
Step 6: Secure the Pre-Cut Fabric
If you pre-cut your fabric using a template, place it inside the placement guideline. Apply a small amount of adhesive spray before placing it to ensure it does not move.
Step 7: Stitch the Outside Edge and Design
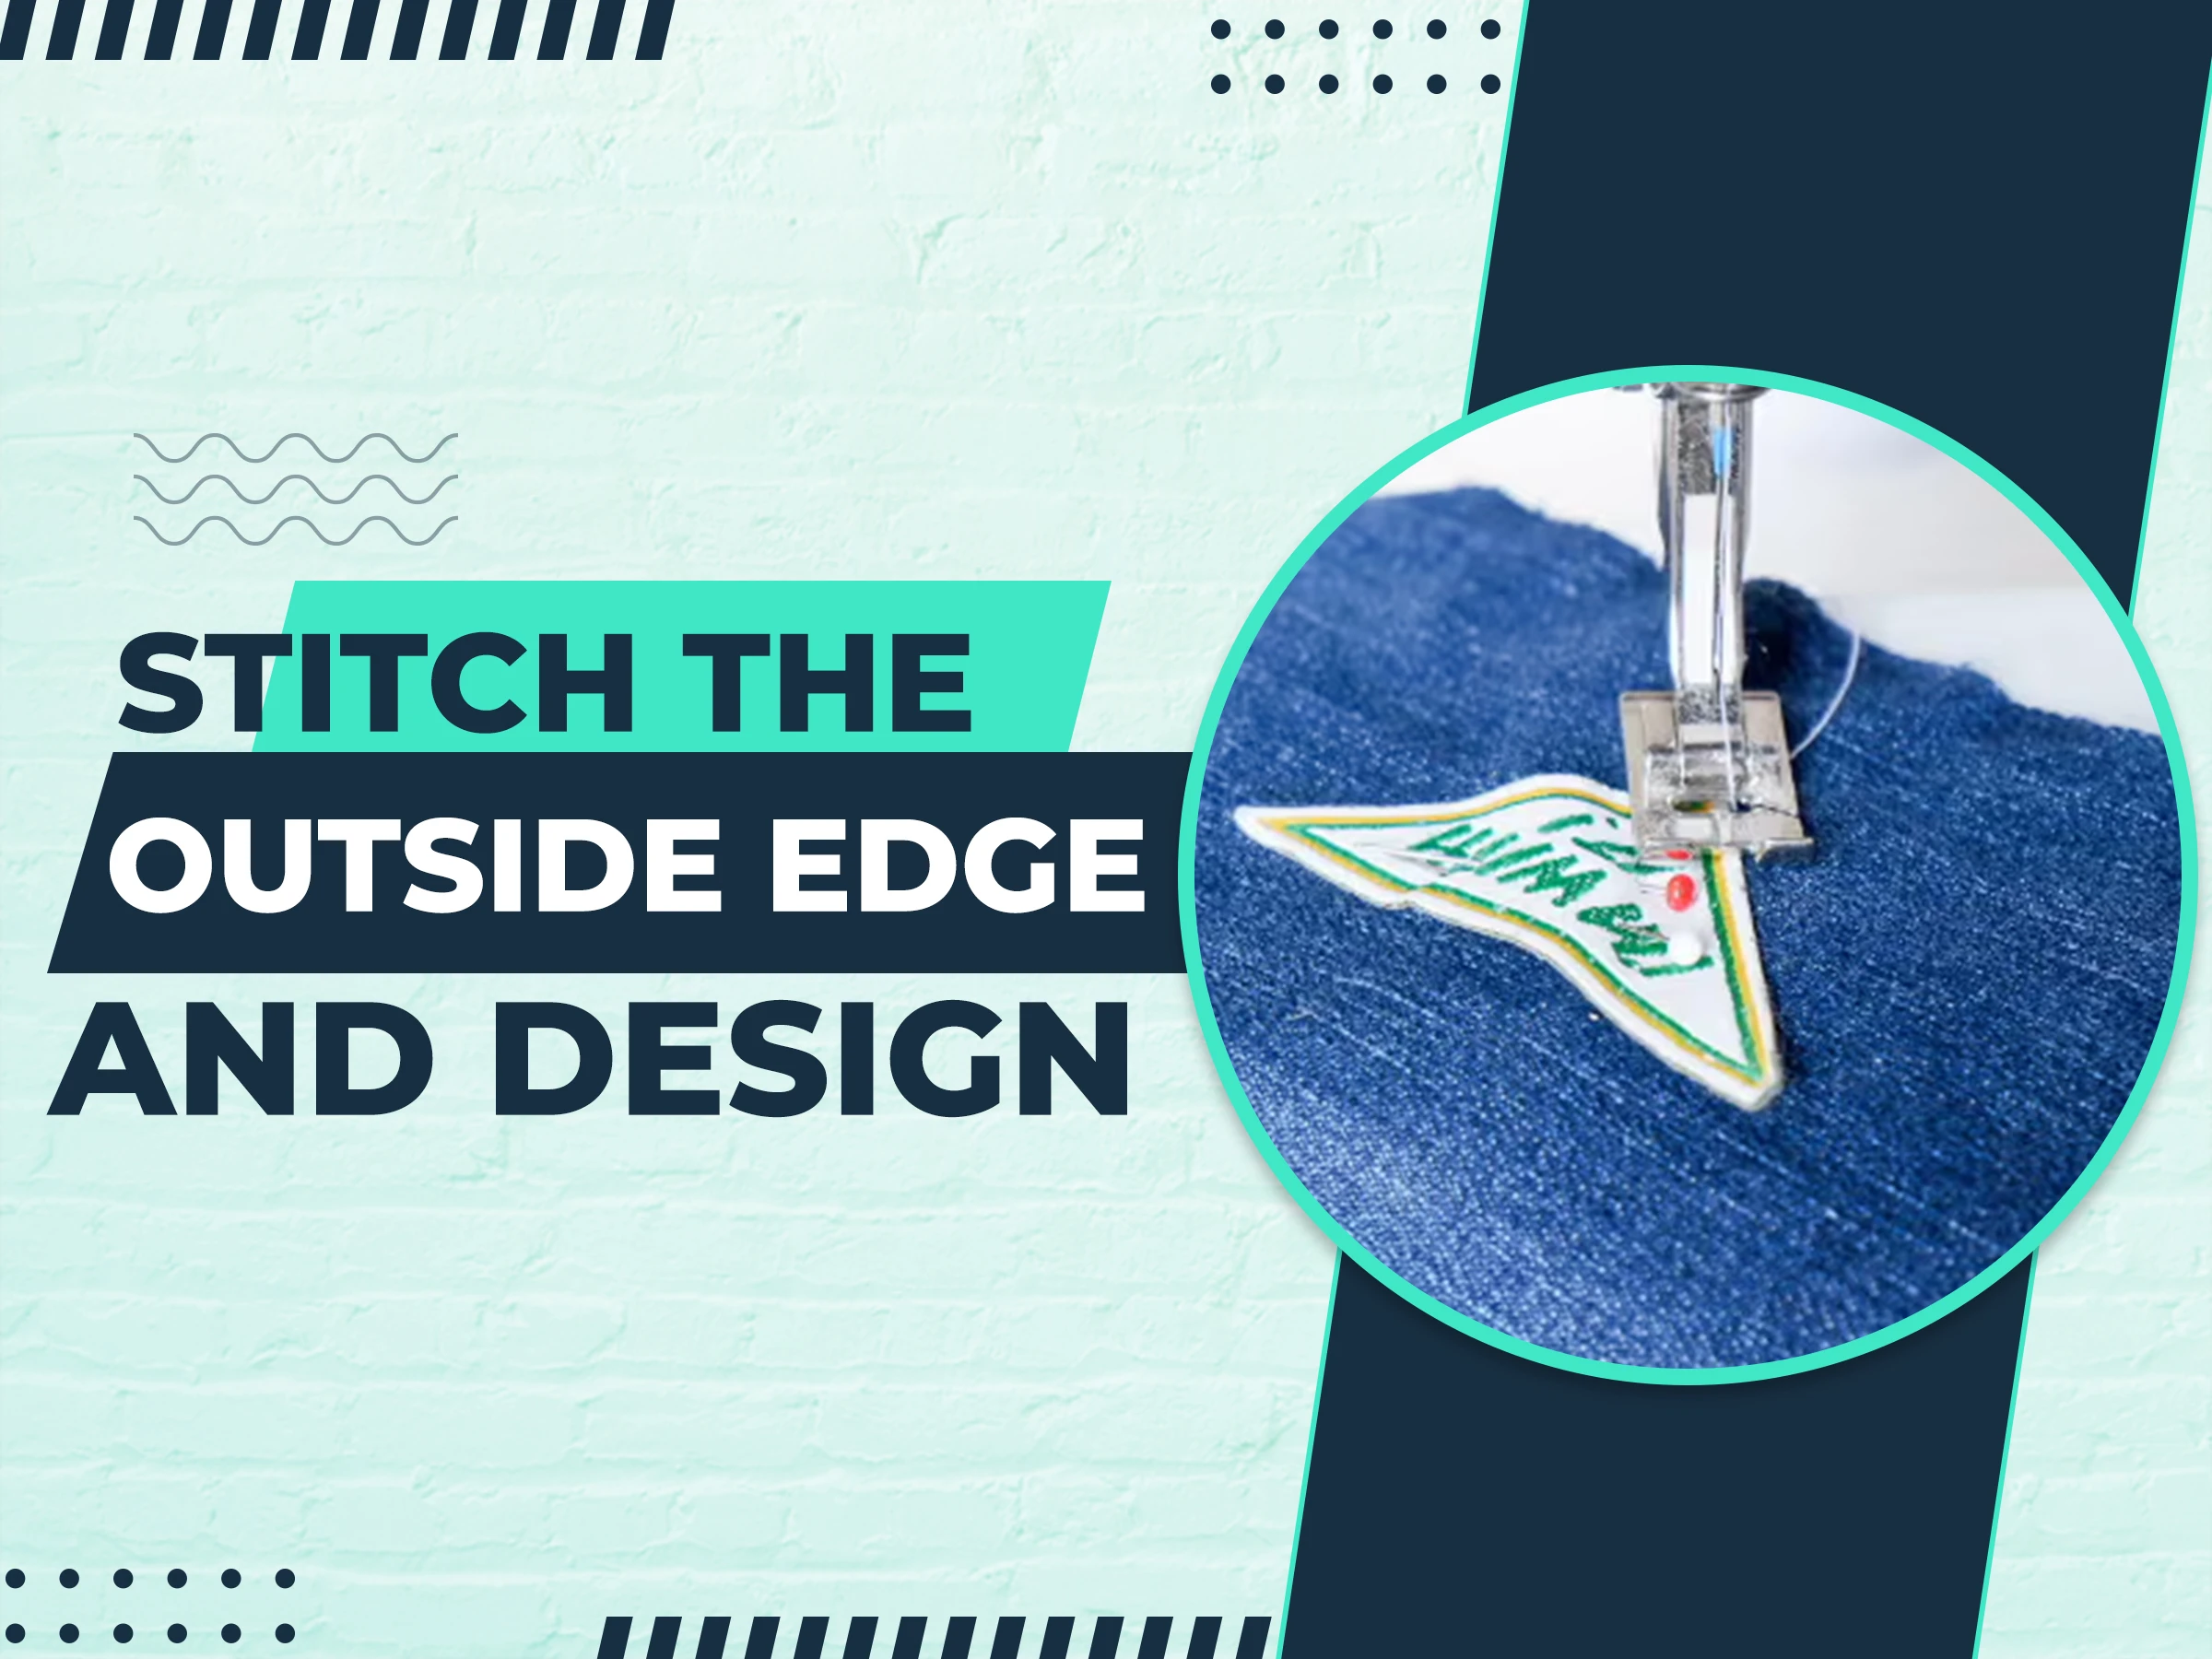 Return the fabric to the machine, which will stitch the outside edge of the patch. Follow the machine prompts to stitch the center design.
Step 8: Remove the Stabilizer and Clean the Patch
Once the design is stitched, unhoop the patch and remove the stabilizer. Trim close to the edges and remove any excess stabilizer using a Q-tip or damp rag. Let it dry completely.
Step 9: Apply Backing for Bonding
Choose a suitable backing to ensure the patch can be adhered to an item. You can use a template or trace the finished shape on an ultra-hold sheet to determine the cut area.
Step 10: Use a Cutting Machine
If making multiple patches, use a cutting machine along with the provided SVG file for efficient cutting.
Step 11: Fuse the Backing to the Patch
Follow the instructions on the outer hold to fuse the backing to the patch. Hold the iron in place long enough to ensure proper adhesion.
Step 12: Attach the Patch to Your Item
.webp) Patches can be placed on caps, totes, pockets, and other items without needing a hoop. Let the adhesive dry, then remove the paper backing.
Patches can be placed on caps, totes, pockets, and other items without needing a hoop. Let the adhesive dry, then remove the paper backing.
Step 13: Final Pressing
Use a pressing cloth if needed, fold extra fabric, and press down firmly, especially along the edges. If possible, turn the item over and press from the back as well, ensuring strong adhesion without burning the fabric.
Step 14: Now Your Patch is Ready to Use
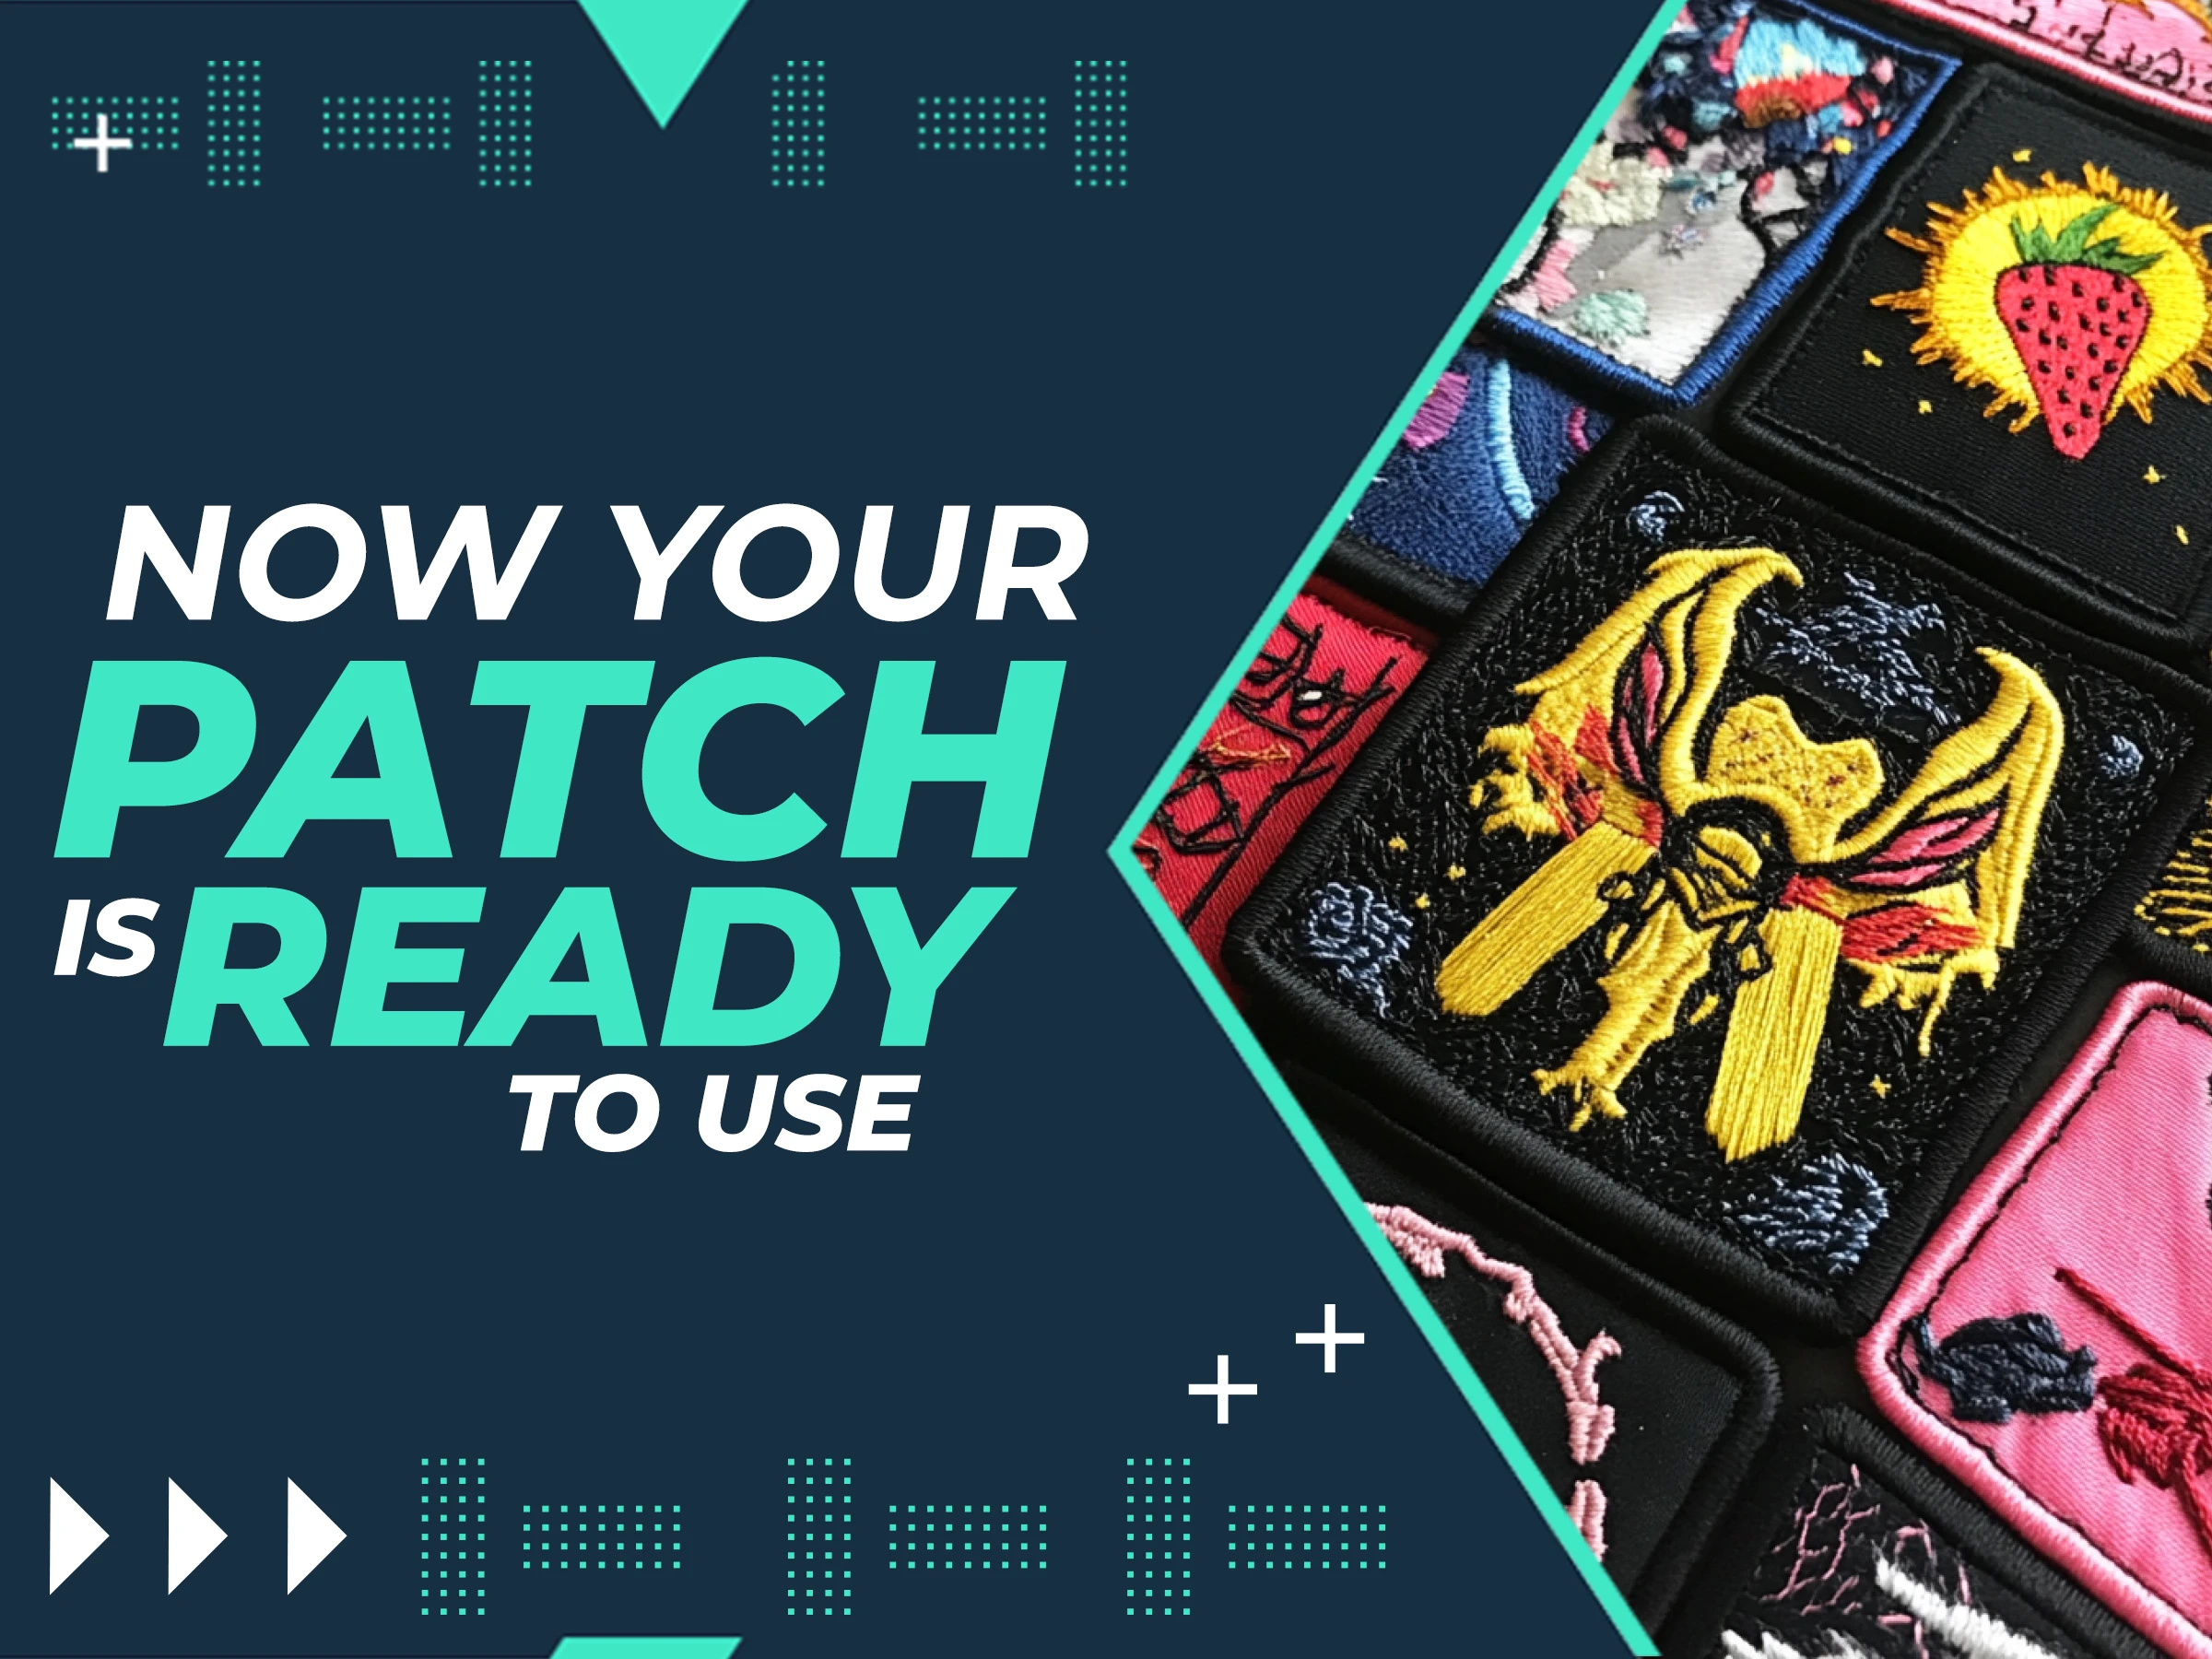 Lastly, pressed firmly and fully adhered, your embroidered patch is ready to be used on any item of your choice.
Conclusion
I hope you got it every step, making patches is not difficult. If you want to make embroidery patches, you require some important supplies, with these required supplies and the proper guidance you will make beautiful embroidery patches for individuals, large organizations, and others. So don't waste your time, start making patches today. And if you face any problems during the patches making process then contact us, we will help you. We create stunning patches for our customers. Trust true digitizing and we will never break your trust.
Thank you for reading.


.webp)