Before you start creating beautiful French knots, gather these essential supplies to ensure a smooth process:
Embroidery Hoop: Keep the fabric tight for accurate stitching.
Fabric: To achieve the best results, choose lightweight fabrics such as cotton and line.
Embroidery Thread: Use high-quality floss in your preferred colors.
Embroidery Needle: French knots work best with an embroidery needle that has a small eye and a sharp tip.
Scissors: Use small, sharp embroidery scissors to trim thread.
Marker or Chalk: To mark your pattern or placement of knots.
Creating a French knot may seem tricky at first, but with practice, it becomes second nature. Follow these simple steps:
Thread Your Needle: Cut a length of embroidery floss (about 18 inches) and thread it through your needle. Knot the other end to secure.
Position the Needle: Bring the needle up through the fabric at your starting point.
Wrap the Thread: Hold the thread tight with one hand and wrap it around the needle twice.
Bring the Needle: While keeping the wraps snug, bring the needle back into the fabric near the starting point. Avoid placing it in the exact hole to secure the knot.
Pull Gently: Hold the thread tight as you pull the needle through the fabric. Your French knot is complete.
French knots are typically stitched, but you can achieve the same look with crochet techniques. Here's an easy guide:
Start with a Magic Ring: Create a magic ring as the base.
Make Single Crochet Stitches: Add a few single crochet stitches around the ring.
Pull Tight: Close the ring and secure it.
Attach to Fabric: Use a sewing needle to stitch the crocheted knot onto your embroidery design.
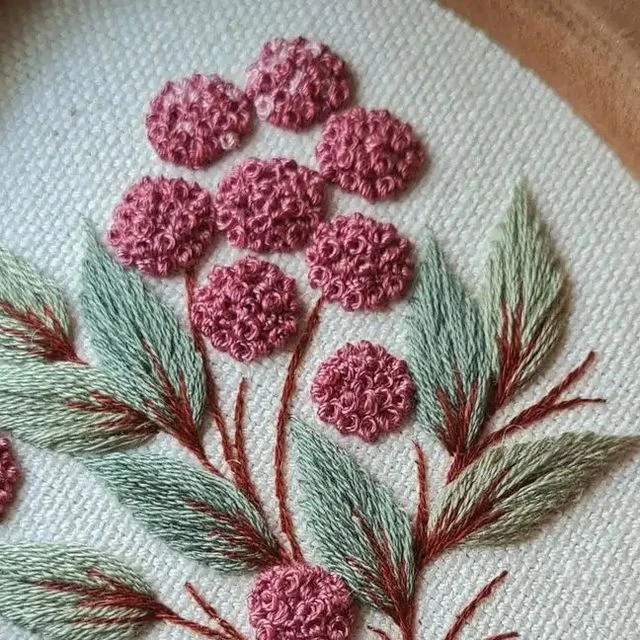
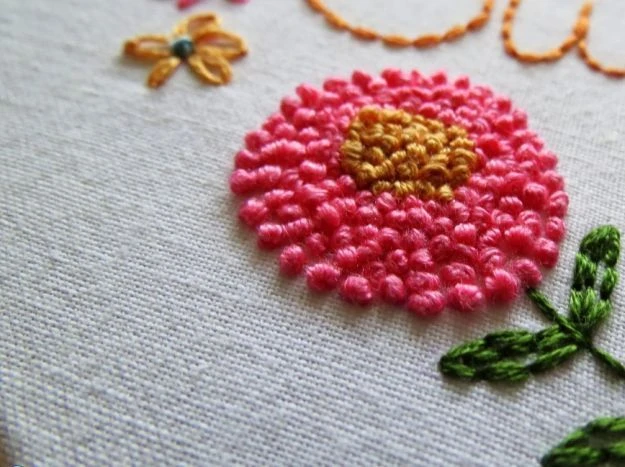
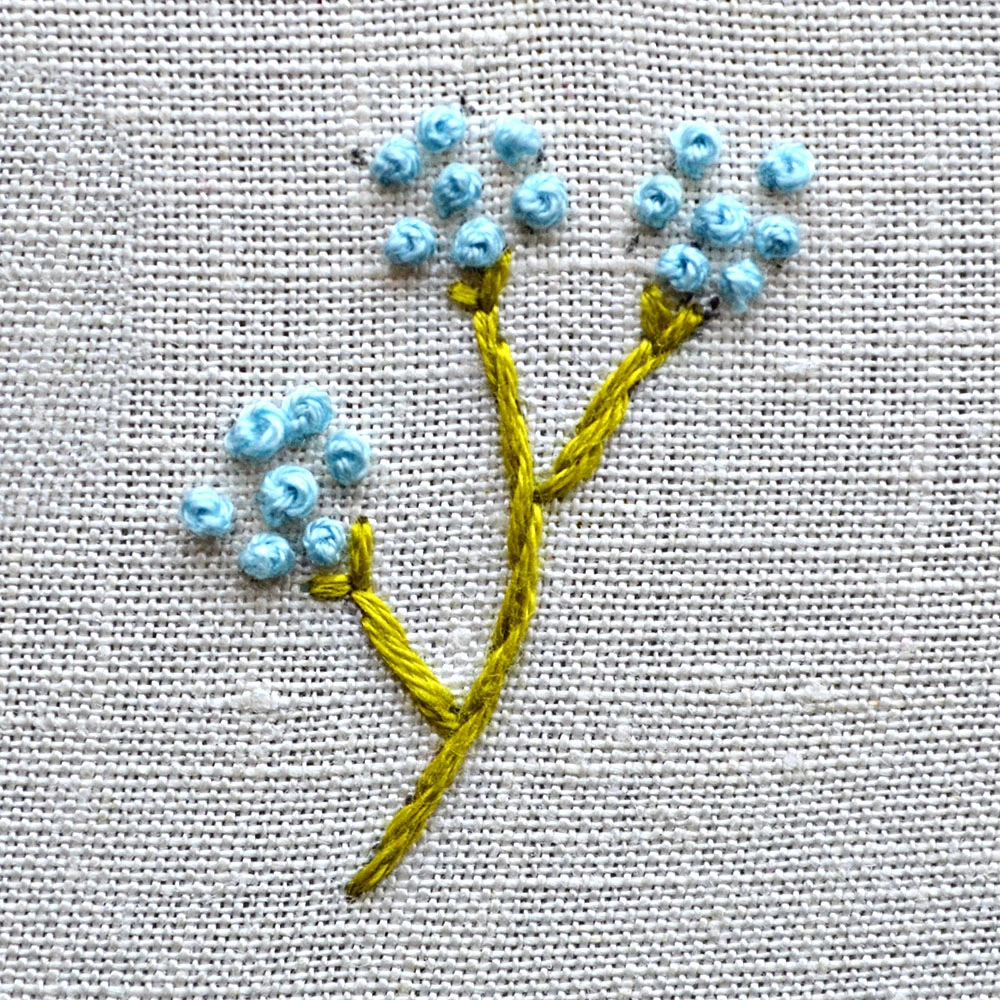
French knots are perfect for creating delicate and intricate floral designs. They can add texture, dimension, and a touch of elegance to any embroidery piece. To craft a French knot flower:
Outline Your Design: Begin by stitching the flower’s shape using a simple outline stitch like a backstitch or stem stitch. This provides a clear guide for placing your French knots.
Fill with Knots: Use French knots to fill the petals and the center of the flower. Experiment with thread colors and sizes for a more dynamic look.
Blend Colors: Combine shades of the same color family to add depth and create a realistic, vibrant flower design.
By combining precision with creativity, French knot flowers bring embroidery designs to life with their textured charm.
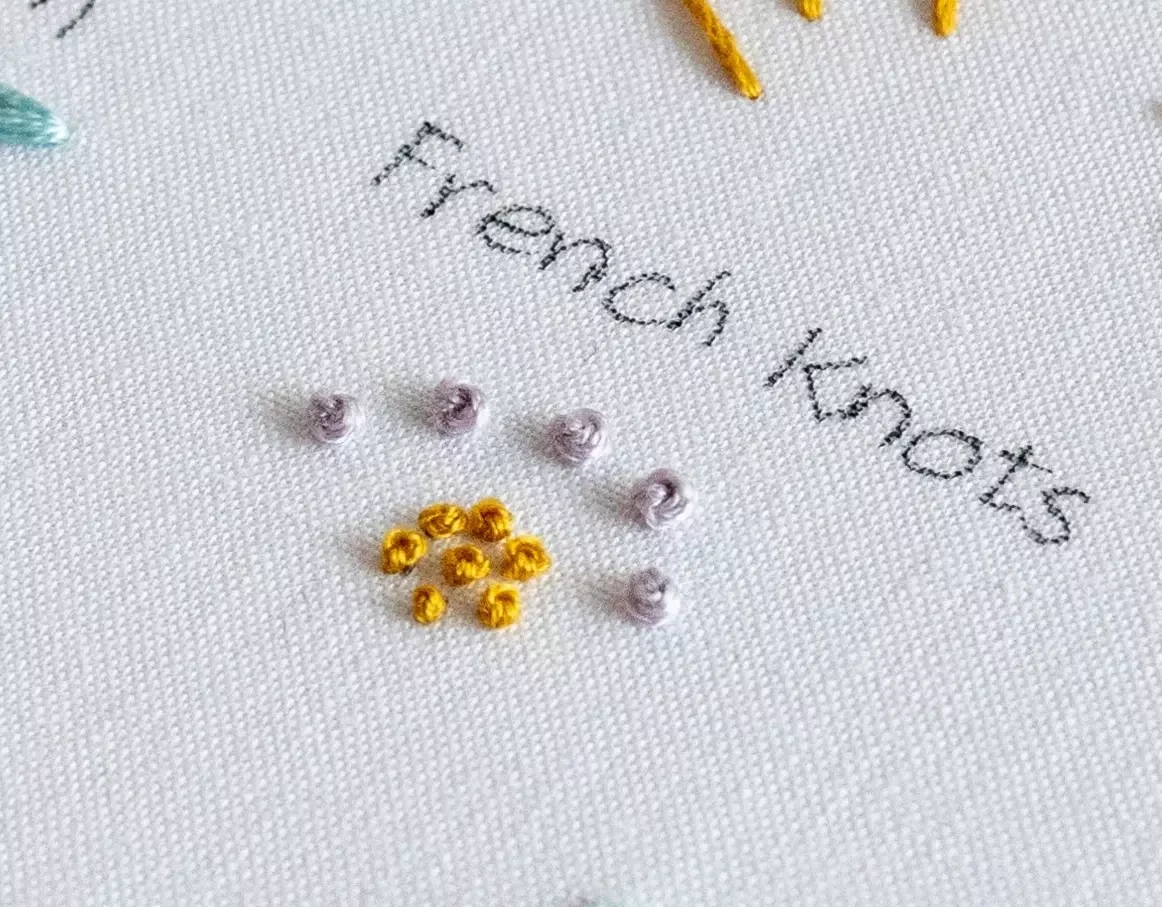
French knots open up a world of creative possibilities in embroidery patterns. Their versatility allows you to use them in various ways, from simple to intricate designs. Popular uses include:
Polka Dot Patterns: Scatter knots across your fabric to mimic playful polka dots. These can serve as accents or fill an entire area for texture.
Nature-Inspired Textures: Use knots to mimic elements like dew drops, berries, or even pebbles in landscape designs.
Thematic Motifs: Create seasonal patterns such as snowflakes for winter or blooms for spring, using French knots as the focal point.
Adding French knots to your patterns is the best way to improve the overall look of your embroidery design.
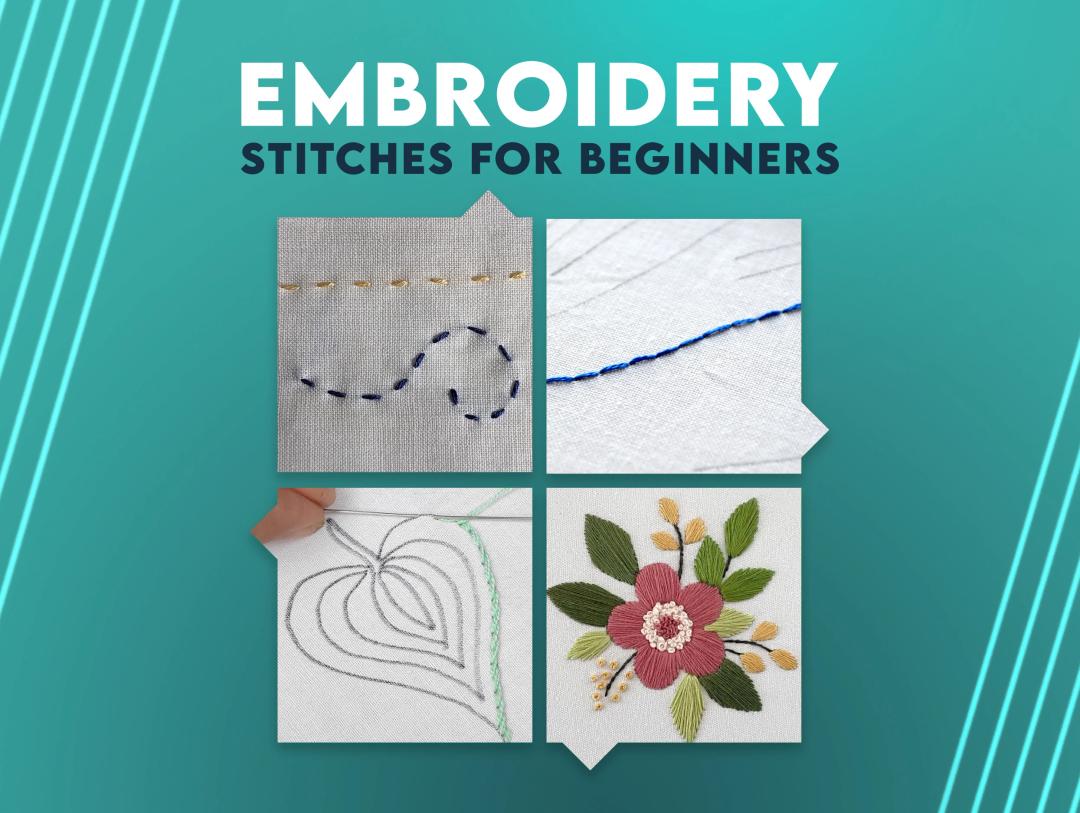
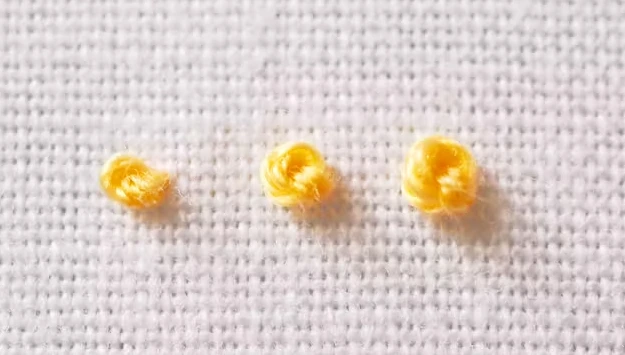
For beginners, patience is key. Practice on scrap fabric before working on your main project. Start with a few loops (1–2) around the needle to ensure control. Choose soft fabrics like cotton, as they’re easier to handle while learning.
Achieving the perfect French knot takes practice, but a few thoughtful techniques can significantly improve your results. These practical tips will help:
Maintain Consistent Tension: Keep the thread taut but not overly tight while wrapping it around the needle to ensure uniform knots.
Avoid Re-Entering the Same Hole: Insert the needle close to the entry point but not in the exact hole to prevent the knot from slipping through.
Practice on Scrap Fabric: Spend time practicing on a piece of small fabric to gain confidence before working on your main project.
With these tips, your French knots will become consistently neat and add beautiful texture to your embroidery designs.
Struggling with tension issues or a tangled thread? Here’s how to troubleshoot:
Untangle Gently: Stop stitching as soon as you notice tangles and gently pull the thread apart.
Check Thread Length: Use shorter thread lengths to reduce tangling.
Adjust Grip: Hold the thread loosely to prevent overly tight knots.
Tighten the Fabric: Stabilize delicate fabrics with interfacing for smoother stitching.
Hand embroidery is an easy craft, and knots are a basic element that adds texture and look to your designs. Apart from French knots, there are other equally exciting knot types to explore:
Colonial Knots: These are sturdier and easier to control than French knots, making them a popular choice for beginners.
Bullion Knots: Long, cylindrical knots are often used for floral elements or embellishments, adding a unique dimension.
Peking Knots: A traditional choice in Chinese embroidery, has intricate details in ornate designs.
Incorporating a variety of hand embroidery knots into your projects enhances their quality and creative appeal.
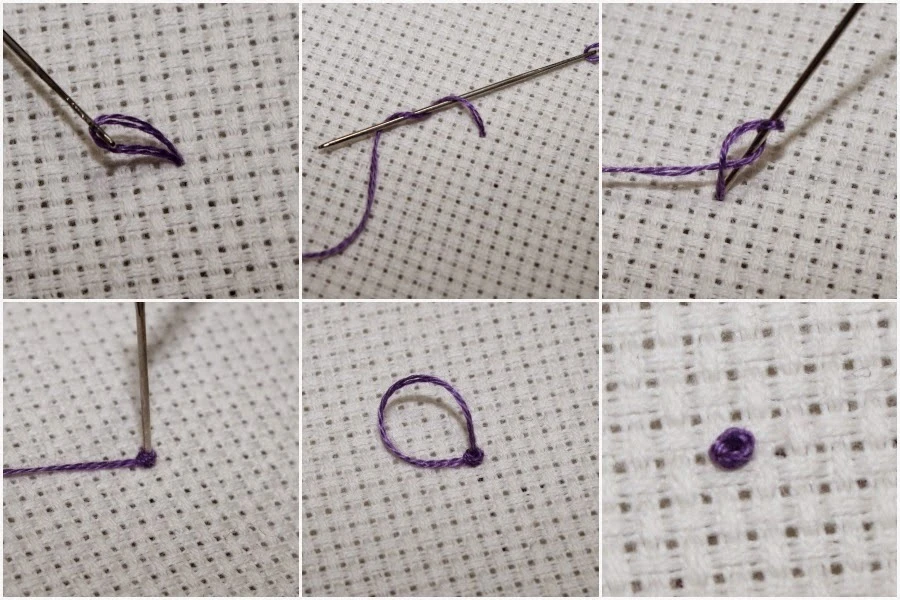
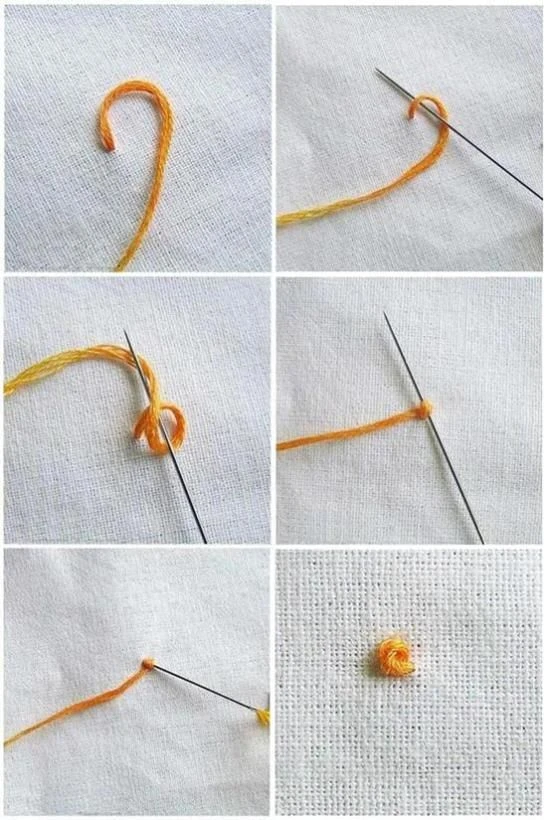
If you are new to embroidery, start with these beginner-friendly steps:
Practice with a single thread to understand tension control.
Use a fabric with a loose weave, making it easier to pull the needle through.
Follow video tutorials for a visual demonstration.
Remember, it’s okay to make mistakes, in each attempt to improve your technique.
Nick William has been immersed in the world of embroidery digitizing for over 20 years, earning 25 industry awards throughout his career. As a 3rd generation embroidery expert, Nick’s journey started in his family’s workshop, where he learned the art of digitizing before the rise of modern software. He has worked with leading commercial embroidery businesses and has shared his expertise with over 75,000 home and professional embroiderers. As an author at True Digitizing, Nick is passionate about teaching others how to create beautiful, precise designs through easy-to-follow tutorials and expert advice.
Categories
Common 3D Puff Embroidery Mistakes and How to Fix Them?
04-02-2025
Raster vs Vector: Choose the Right Format
24-01-2025
Applique Embroidery Digitizing Tips And Tricks: A Comprehensive Guide
24-01-2025
Best Embroidery Digitizing for Bags - Tips and Tricks
23-01-2025
Embroidery Digitizing for Jackets - A Complete Guide
23-01-2025
Custom Embroidery Digitizing For Polos: Everything You Need To Know
23-01-2025
Transform Your Embroidery Workflow: How to Convert PDF to DST?
17-01-2025
How to Digitize a Logo for Free? A Complete Guide
17-01-2025
How to Convert AI to DST File
17-01-2025
Choose The Best Hat Embroidery Machine: Top Picks
09-01-2025